
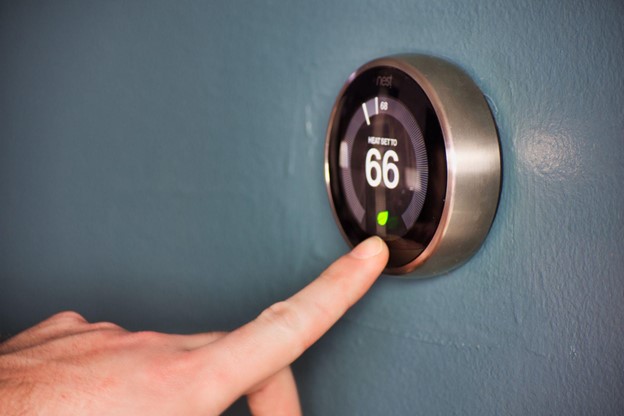
Using just a single app, the Google Nest Thermostat lets you control your air conditioning or heating system from anywhere.
With this device offering such incredible convenience, finding out that it won’t charge anymore can feel like a disaster.
Nest Thermostat charging issues are not uncommon, with many users reporting a frequent low battery indication or their smart thermostat not charging at all. This is particularly true for Nest Thermostats that have been used for several years as the battery ages and gradually loses efficiency.
Luckily, there are some straightforward methods you can use to fix your Nest Thermostat’s battery level right at home. This article will cover some of the most common fixes for Nest Thermostats that won’t charge.
How to Fix Nest Thermostat That Won’t Charge
It’s true that Nest Thermostat users commonly encounter charging issues. The good news is that often the solution to your Nest battery problem is so simple that it’s almost like a standard form of maintenance.
Here are some of our best solutions to fix a Nest Thermostat that won’t charge.
Restart the Nest Thermostat
Sometimes, simple troubleshooting methods are all you need to fix your Nest Thermostat charging issue.
Many smart devices can encounter running errors that cause the battery or other components to malfunction. Still, restarting the device can erase any accumulated errors and determine whether it caused the battery issue.
To restart your smart thermostat, press and hold down on the Nest Thermostat ring for around 10 seconds until the screen turns off. Then, press and release the ring to turn it back on.
Check if the C Wire is Properly Connected
When the Nest Thermostat is used, it relies on a C Wire (common wire) cable to provide all the power necessary for its components. Sometimes, the C Wire can come loose with prolonged use and cause strange power issues.
Luckily, it’s straightforward to check if the C Wire is loose — and with the proper knowledge, it’s even easier to fix. To check, you can take the following steps:
- Remove your Nest Thermostat’s cover. Use the circuit breaker to remove all power supply from your furnace and Nest Thermostat.
- Once you’ve removed the cover, you will see a variety of labeled terminals. Find the terminal labeled ‘C.’
- If there is no wire in the C terminal and a loose wire in the thermostat, or if the wire in the C terminal is only loosely connected, you will need to reconnect the wire correctly. You may need to look in the wall to verify whether there is a C wire. You can also look at the furnace connections to confirm that there is no hidden C wire. Once you have found both ends of the C wire, the process is as simple as connecting it to the C terminal at the Nest Thermostat and the furnace.
- You will need to get a C wire if there is no wire in the C terminal and only four wires in the thermostat.
- You should go to your furnace and check the wiring. In many cases, homeowners have found that they did have a C wire — but instead of being routed to the thermostat, the C wire was left unconnected at the furnace. You can connect the unused C wire to the furnace and the thermostat.
- Many sellers on websites like Amazon offer Add-A-Wire HVAC adapters that can be used to correct your wiring. You can also purchase a Google Nest Power Connector C Wire Adapter to resolve the battery power issue. These devices can be installed individually if you’re handy with HVAC, or you can call an HVAC technician for expert help with installation.
- Some Nest Thermostat users repurpose the G-wire (fan) to the C Wire. You can simply remove the G-wire from the G terminal and plug it into the C terminal. You will need to repeat this process at the Nest Thermostat AND the furnace. You will also need to create a jumper cable between the Y and G terminals on the furnace to preserve the function of the fan (ensuring that cold air is blown through the house). To create the jumper cable segment, you can snip a portion of loose wire, strip the ends and middle, fold it into a U shape, and connect it to the Y wire.
- Depending on what changes you made to your Nest Thermostat, you should uninstall and reinstall the furnace within the app to update the wiring information.
USB Charge the Thermostat
If you’ve found that your thermostat is correctly connected to the HVAC unit and restarting it didn’t help, the next step to try is manually charging it with a USB cable. This can sometimes resolve the issue because Nest Thermostats with wholly drained batteries sometimes have problems pulling power from the HVAC system.
To charge the thermostat manually, you can simply remove the Nest Thermostat display and plug it into a USB cable. You can verify whether the display is charging by looking for the blinking red light on the front of the thermostat.
Reset the Nest Thermostat
Assuming that no other solutions have resolved the issue with your Nest Thermostat, you may find that factory resetting and reinstalling the Nest device gets it back in working order.
And luckily, while it does take time to reset and reinstall the thermostat, the process is simple. To factory reset your Nest Thermostat, take the following steps.
- Press on the Nest Thermostat’s screen to open the Quick View menu.
- Select Settings.
- Turn the ring to select Reset.
- Press on the thermostat screen to select Reset All Settings.
What to Do if Nothing is Working
Unfortunately, while the troubleshooting methods described above can help many users, others find that nothing seems to resolve the issue with their Nest Thermostat.
In these cases, the inability to charge is most likely caused by a dead battery or the Nest Thermostat malfunctioning. Luckily, there are still steps you can take to address the issue.
Fix the Nest Thermostat Using Your Warranty
If your Nest Thermostat unit is still covered under its warranty, then using the warranty may be the best way to resolve your issue. Many retailers that stock Google Nest Thermostats offer excellent warranty policies that cover defective and broken units.
You will need to look at the terms of your warranty to determine whether your thermostat is covered. Many users with Nest Thermostat battery issues are issued replacement thermostats under their warranty.
Add a C Wire
If your Nest thermostat was installed without a C wire, now would be a good time to install one. This ensures a steady stream of power to your thermostat.
Add a Nest Power Connector
This component functions similarly to a C wire. The goal is to ensure a steady electrical connection with your Nest thermostat.
While you can find off-brand power connectors, Google recommends purchasing an authorized version to avoid causing damage to your Nest thermostat.
Replace the Battery at Home
If your warranty no longer covers your Nest Thermostat E or Nest Learning Thermostat, there’s no need to despair. While replacing a Nest Thermostat battery isn’t as simple as inserting an AA battery, it can be done at home with the proper knowledge and tools.
*Important note: be sure to confirm battery compatibility before ordering a replacement. Different models use different batteries.
After ordering a replacement thermostat battery, you can take the following steps to remove the defective battery and insert the new thermostat battery. These steps are complex and will void your warranty, so attempting an at-home replacement is not advised unless your warranty has expired:
- Pull the Nest Thermostat off of the base.
- Use a small Phillips-head screwdriver to remove the two screws from the thermostat’s base.
- Rotate the rear cover to unlock it, then remove the back cover from the thermostat. A cable will connect it, so you must be very careful lifting and gently setting aside the panel.
- Use your small Phillips-head screwdriver to remove the four screws from the black battery cover. As the ribbon cable threads through the battery cover, you will need to lift it gently. Move the battery cover and rear cover to the side, ensuring that the ribbon cable stays intact. You should have full access to the thermostat battery now.
- Gently unplug the power cord that attaches to the battery. Then, gently lift the battery from the base. You will need a precise tool to work effectively with the small components.
- Place your new battery correctly, and plug the power cord into the board.
- Gently replace the black battery cover, ensure the ribbon cable stays intact, and replace the four screws.
- Gently replace the rear cover, ensuring that the ribbon cable stays intact. Rotate the cover into the locked position and replace the two screws.
For more troubleshooting tips on Nest thermostats, see:
- How to turn off a Nest fan that is always on
- How to set a Nest thermostat to hold the temperature
- How to fix a Nest thermostat that won’t turn on the A/C
Final Thoughts
Nest Thermostats can add incredible convenience and comfort to a home. And when compared to competitors like Ecobee, it’s clear just how valuable the Nest Thermostats are.
If you find that your Nest Thermostat stops charging, don’t immediately throw in the towel and get your money back! There are many quick and effective methods to fix a Nest Thermostat that you can do from the comfort of your home, so you can get back to your seamless smart home lifestyle in no time.