
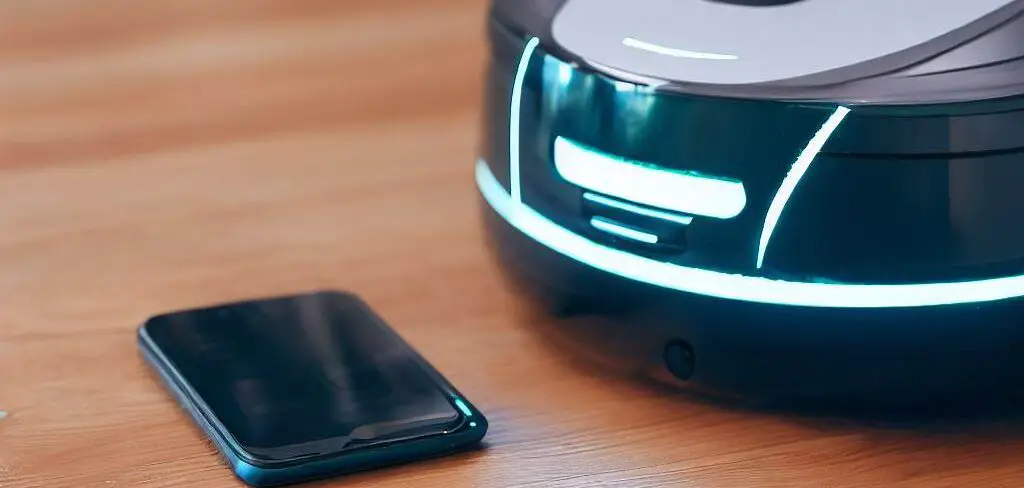
If you own a Shark vacuum, you know how convenient it is to be able to control it with your smartphone and a WiFi connection. But what do you do when your Shark vacuum will not connect to WiFi?
Fear not, it’s a common problem that Shark vacuum users encounter. And thankfully, there are a few easy fixes that you can try yourself before calling for technical support.
In this article, we will explain the possible causes of a Shark vacuum not connecting to WiFi and provide step-by-step instructions for troubleshooting the problem.
Before You Start: Check Your WiFi Network
Before you start troubleshooting your Shark vacuum, it’s critical to make sure that the problem is not with your WiFi network. To do this, try to connect another device, such as a laptop or smartphone, to your WiFi network and see if it can access the internet.
If the other device cannot connect to the internet, the problem is likely with your WiFi network itself and not with your Shark vacuum. In this case, you will need to troubleshoot your WiFi network before you can fix the problem with your vacuum.
First, check that your router is powered on and that all the cables are securely connected. If the cables are loose or damaged, this can cause problems with your WiFi connection. Make sure that the Ethernet cable is connected to the WAN port on your router and that the power cable is plugged into a working wall outlet.
Next, check that your WiFi network is enabled and that it is broadcasting a signal. On most routers, you can do this by pressing the “WiFi” or “Wireless” button on the front or side of the router. If the button is lit up or if it is flashing, it means that the WiFi is enabled and broadcasting a signal. If the button is off or is not lit up, the WiFi is disabled and you will need to enable it before you can connect any devices to it.
If your WiFi network is enabled and broadcasting a signal, the next step is to check the settings. On most routers, you can access the settings by typing the router’s IP address into a web browser and logging in with the username and password.
If you are still unable to connect to your WiFi network after checking and adjusting your WiFi settings, there may be a problem with your internet service provider (ISP) or with the router itself. In this case, you will need to contact your ISP or the manufacturer of your router for further assistance.
If other devices can connect to the internet, the problem is likely with your Shark vacuum and you can proceed to the next steps.
Is Your Vacuum Frequently Disconnecting, or Never Connecting at All?
For most users of Shark vacuums, WiFi troubles occur in one of two ways:
(1) The Shark can be connected to WiFi, but then it frequently disconnects and has to be restarted and reconnected. Usually, but not always, the vacuum loses WiFi connection after sitting on the charging dock for a few hours.
(2) The Shark will not connect to WiFi at all.
For people in the first category, we have good news and bad.
The good news is that the issue of frequent disconnections won’t render your device useless. You will still be able to get on WiFi, access the smart functions of your vacuum, and use it as intended.
The bad news is that you will likely need to restart and reconnect your vacuum with every use. Most users that experience this problem are never able to achieve a “fix.” Instead, they just find that their vacuum’s WiFi connection is lost during each charging cycle.
Again, not insurmountable, but also not ideal.
For people in the second category, those that cannot get the vacuum to connect to WiFi at all, continue reading as we guide you through the troubleshooting steps. We trust that this is the most useful, reliable troubleshooting guide you will find anywhere.
Shark Vacuum Won’t Connect to WiFi: 13 Ways to Troubleshoot
Restart Your Shark Vacuum
One of the easiest fixes for a Shark vacuum that refuses to connect to WiFi is to restart it.
To do this, simply turn the vacuum off, wait thirty or more seconds, and turn the vacuum back on. This can reset the vacuum’s WiFi connection and may solve the problem.
*Most Shark vacuum models have a physical power button on the side. Because every model is slightly different, be sure to look up your exact model if you have questions about the restart process.
**If you are in doubt, you can simply remove the battery, wait a minute, and re-install the battery. This way, you know the reset is successful.
Once the vacuum is powered on, try to connect to it with your smartphone and the SharkClean app. If the vacuum is still unable to connect to WiFi, proceed to the next step.
Restart Your Router
If restarting your Shark vacuum did not fix the problem, the next step is to restart your router. To do this, unplug the router from the wall outlet and then plug it back in after a few seconds. This can reset the router’s WiFi connection and may solve the problem.
Once the router is powered on, try to connect to it with your smartphone and the SharkClean app. If the vacuum is still unable to connect to WiFi, continue with the troubleshooting process.
Verify That You are Using 2.4 GHz WiFi
As is the case with many smart home devices, Shark vacuums generally only work with 2.4 GHz (rather than 5.0 GHz) WiFi. If you have a fancy new router that uses 5.0 GHz, you will need to switch back to the 2.4 GHz band to get your Shark online.
Make Sure the Dock is Close to Your Router
Forgive us if this seems obvious, but we will mention it anyway — especially because this is the first “fix” that the company’s tech support will suggest.
The charging dock should be located close enough to your router that it receives a strong signal. Even if it seems pointless, you may as well position the dock right next to the router during troubleshooting. If nothing else, it will save you time on the phone with tech support.
Try Using iPhone Rather than Android
Here’s a weird trick that often works.
If you use an Android phone, try downloading the SharkClean app from a friend or family member’s iPhone. From the iPhone, follow the setup instructions and connect to WiFi.
If and when the WiFi connection is established, you can log back in to the SharkClean app on your Android and use it normally. We can’t explain this compatibility issue, but it is nonetheless real. There are many users that have reported this fixing their problem.
Use Phone as a Hotspot
Many smart home issues are caused by hard-to-diagnose WiFi issues. There isn’t anything “wrong” with your router, and there isn’t anything “wrong” with your vacuum — but sometimes they don’t play nicely together.
If nothing to this point has worked, try bypassing your router altogether. To do this, activate a WiFi hotspot on your phone. Once activated, connect the vacuum to the phone’s hotspot rather than your home router.
DNS, VPN, Adguard, Etc.
It is also possible that a VPN or adblocker is “blacklisting” your vacuum.
In this case, you should disable your VPN and/or Adguard or any other security feature that may be disrupting the connection. Don’t worry, you will be able to enable your security features again once your vacuum is connected.
This is a simple and easy fix for many people that have spent hours troubleshooting the vacuum only.
Check the Vacuum’s WiFi Settings
If restarting your Shark vacuum and your router did not fix the problem, the next step is to check the vacuum’s WiFi settings. To do this, follow these steps:
- Press the Power button on your Shark vacuum to turn it on.
- Press and hold the WiFi button on the vacuum for five seconds. This will put the vacuum into WiFi setup mode.
- On your smartphone, go to the WiFi settings and look for a WiFi network with the name “Shark-XXXXXX”, where “XXXXXX” is a unique six-digit code for your vacuum.
- Select the “Shark-XXXXXX” network and enter the password “SharkClean”, without quotes, when prompted.
- Once connected, open the SharkClean app on your smartphone and follow the on-screen instructions to finish setting up the vacuum’s WiFi connection.
Make sure that you are within range of the vacuum’s WiFi signal. The vacuum’s WiFi range is limited and it may not be strong enough to reach certain areas of your home. To ensure that you are within range, try to keep your smartphone close to the vacuum while setting up the connection.
If you are unable to connect to the “Shark-XXXXXX” WiFi network, or if you are unable to find it in your WiFi settings, there may be a problem with the vacuum’s WiFi hardware. In this case, you will need to contact Shark’s technical support for further assistance.
Update the SharkClean App
If you can connect to the “Shark-XXXXXX” WiFi network but still cannot control your Shark vacuum with the SharkClean app, the next step is to make sure that the Sharkclean app on your phone is updated to its latest version. To do this, do the following:
- Go to the Google Play Store or the App Store on your phone.
- Search for the SharkClean app and open its page.
- If there is an update available for the app, tap the “Update” button to download and install the latest version.
- Once the update is installed, open the app and try to connect to your Shark vacuum again.
If the issue persists, move on to the next step in the troubleshooting process.
*As an alternative to updating the app, you can also delete and re-install the app. This ensures that you are downloading the most recent version that is available for your device.
**At this point, you should also delete and re-add your device within the app.
Check Your Router’s Firewall Settings
If you have tried all of the steps above and you are still unable to connect your Shark vacuum to WiFi, the next step is to check your router’s firewall settings. Some routers have a firewall that can block certain types of traffic, including the signals from your Shark vacuum.
To check your router’s firewall settings, follow these steps:
- On your computer, open a web browser and type your router’s IP address into the address bar. The IP address is typically something like “192.168.1.1” or “10.0.0.1” and you can find it in your router’s documentation or by searching online for the model of your router.
- When prompted, enter your router’s username and password. These are typical “admin” and “password”, without quotes, but they may be different depending on your router. If you do not know your router’s username and password, you can find them in the router’s documentation or by searching online.
- Once you are logged in to your router’s settings, look for a section labeled “Firewall” or “Security” and click on it.
- Look for a setting that allows or blocks certain types of traffic, such as “UPnP” or “Port Forwarding”, and make sure that it is set to “Allow” or “Enabled”.
- Save your changes and try to connect your Shark vacuum to WiFi again.
When you are troubleshooting your router’s firewall settings, it is important to ensure that you do not accidentally block any important traffic. Some firewall settings can block certain types of traffic, such as online gaming or video streaming, which can cause problems with your internet connection.
If you are unsure about how to change your router’s firewall settings, it’s best to contact your router’s manufacturer for assistance.
Turn Your Router’s Password Off (Momentarily)
We will give the usual caveat that it is a terrible idea to leave your router set up without a password. However, here we will turn the password off momentarily only.
During the troubleshooting process, try to set your router to not ask for a password. This is just another gatekeeping step that we want to check on. If this solves the problem, at least you know how to proceed with troubleshooting.
DIY Option: WiFi Circuit Board & Other Potential Solutions
We won’t spend too much time here, because it is only worthwhile for those of us with DIY skills. And needless to say, it is essential to properly diagnose the issue before buying any replacement parts and/or voiding a warranty by opening the device.
However, if you have the time, the skills, and your device is out of warranty, the WiFi card circuit board is relatively cheap to replace.
Thankfully, there are quite a few teardown videos available to help guide the ambitious DIYer:
Contact Shark Support
If you are still unable to connect your Shark vacuum to WiFi after checking your router’s firewall settings, there may be a problem with the vacuum’s WiFi hardware. In this case, you will need to contact Shark’s technical support for further assistance.
Shark has a relatively efficient technical support team that will guide you through the troubleshooting process, and, if necessary, schedule a visit to examine your Shark vacuum.
Optimizing the WiFi Environment for Your Shark Vacuum
While the previous sections delve deep into troubleshooting when your Shark vacuum won’t connect to WiFi, there is more that can be done to ensure you have the most optimized WiFi environment to prevent such issues from arising. Here, we will discuss how to set up your home network in a way that is most conducive to the smooth operation of your Shark vacuum.
Choose the Optimal WiFi Channel
WiFi routers can broadcast on several different channels. By choosing the right one, you can minimize interference and improve the connection of your Shark vacuum. Use a tool like a WiFi analyzer to find the least crowded channel and set your router to use that.
Position Your Router Strategically
Try to position your router in a central location in your home and keep it off the floor. WiFi signals spread out downwards, so the higher you place your router, the better the signal coverage will be. Avoid keeping your router close to metal objects, microwaves, or cordless phones as these can interfere with the WiFi signal.
Regularly Update Your Router Firmware
Firmware updates often contain improvements and fixes for problems. Regularly updating your router firmware can help maintain a stable and secure WiFi network for your Shark vacuum to connect to. Check the manufacturer’s website or use the router’s interface to update its firmware.
Upgrade Your WiFi Equipment
If you have an older router, it might not be able to provide the strong, stable signal that your Shark vacuum needs. Consider upgrading to a newer model or using a WiFi extender to increase your router’s range.
Remember, a stable and strong WiFi network is key to ensuring the smooth operation of all your smart devices, including your Shark vacuum.
Key Takeaways
If your Shark vacuum won’t connect to WiFi, there is absolutely no reason to panic. There are a few easy fixes that you can try yourself before calling for technical support. Start by checking your WiFi network, restarting your vacuum and router, and checking the vacuum’s WiFi settings.
If none of these steps work, try updating the SharkClean app and checking your router’s firewall settings. If you are still unable to connect your Shark vacuum to WiFi, contact Shark’s technical support for further assistance, and your Shark vacuum will be up and running in no time.
FAQs
Why does my Shark Vacuum disconnect from WiFi when charging?
This could be due to power saving features incorporated into the vacuum. When the vacuum is docked and charging, it may disconnect from WiFi to save power. Once undocked, it should automatically reconnect. If it does not, follow the troubleshooting steps outlined in the article.
Can I use a 5G network for my Shark Vacuum?
Currently, Shark vacuums are only compatible with 2.4 GHz WiFi networks. While many modern routers can broadcast both 2.4 GHz and 5 GHz networks simultaneously, ensure that your vacuum is connecting to the 2.4 GHz network for successful operation.
What should I do if my Shark Vacuum WiFi issue is not resolved after trying all the solutions provided?
If all else fails and your Shark Vacuum is still not connecting to WiFi, it is advisable to contact Shark’s technical support. They can guide you through further troubleshooting and, if necessary, schedule a service appointment to examine your vacuum.